The plane that will carry the BECO 2.0
Check below for construction pictures and comments. |

Photo courtesy of Ryan Gonsoulin |
While building the BECO 2.0 engine, I have been constantly looking for a plane that I can build that is large enough to carry the engine. The one that I have settled on, Ryans Rebel, I saw in the December, 2002 issue of Radio Control Modeler. With the engine almost complete, I am getting ready to start on construction of the plane. My purpose is to use the engine that I have built to power a plane. I thought about designing a plane myself, but I really know nothing about plane design and would hate to learn it the hard way. So I have decided to go with a proven design.
This plane has the features that I am looking for: Plenty large enough to carry the weight of the engine, and simple enough for an unexperienced builder to construct. I have not built a plane from scratch before, so this will be a learning experience for me. The fact is , I have only built ONE wooden plane. I have built/rebuilt several of the kombat style planes. I learned to fly with a kombat plane and they will always be a part of my collection. But I think that a wooden plane is called for now. (especially since the Airplane Factory stopped selling the "Big Mama")
Before I decided to use Ryan's Rebel, I compared all of the engines that were said to work with the plane. My engine is one and a half, to two pounds heavier than any of the engines said to be used with the plane. I was concerned with the extra weight. I tried to find the address of Mr. Ryan Gonsoulin in the RCM Magazine, but it was not there. However, a couple of days later I recieved an email from him. Just when I was wanting to find him, he found me. I told him my concerns about the plane being nose heavy, and he said that I should be able to shorten the nose a bit, and not have to add weight to the tail. He also provided me with a picture of his beautiful plane, shown above. (Thanks a bunch Ryan). I hope I can make my plane look as good as his.
|
First problem: I glued all of the wing spars to the ribs before installing the blocks for the wing hold downs. Solution: I had to cut the sub spar to get the blocks installed. I left out the small piece of the sub spar, since the filler block takes up most of the space and it gets sheathing over it.
Problem 2: Curved wood. The wing leading edge (1/2 x 1 x 48 balsa) was very crooked.
Problem 3: The 1/8 sheet balsa for the fuse. sides was too short to make the full length.
Problem 4: I ran out of 1/8 lite-ply. I didn't layout all of the pieces before cutting, and the left overs were too small to make the required pieces. I also cut F4 from lite-ply before I realized that it is supposed to be balsa.
|
Ryans Rebel - The construction
|
12-Mar-08 After building enough of the parts, I assembled the plane as best I could and added weights for servos, batteries etc. and checked for balance. What a surprise! I had a very nose heavy plane. The BECO 2.0 is very heavy compared to the other engines that are suggested for this plane. The firewall must be moved back. I have already moved the firewall back 1-1/4 inches (from the plans), and now I need to move it even more. After some tedious checking, I found that I will need to move it all the way to the leading edge of the wing. This will cut off most of the front of the plane. Oh well, it must be done. This pic shows the firewall moved and the sides of the fuse cut out for the cylinders. I am not sure if I want to cut off the entire front of the plane or not. I think I will wait and see what works best. | 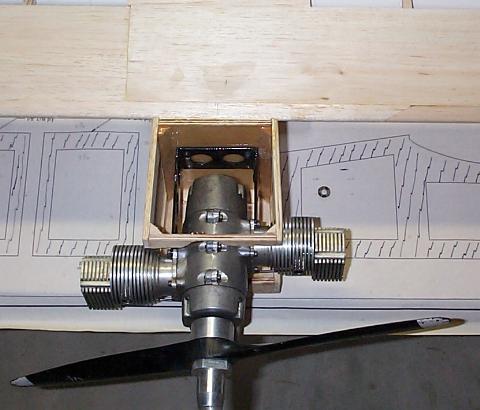
|
|
12-Feb-08 Here is a pic of the plane assembled without gluing the tail on. I have left off the fuselage top sheathing until I can finish the tail wheel and servo mounts in the tail section. | 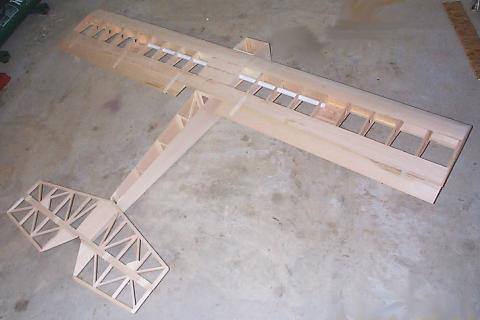
|
|
21-Dec-07 Here is the fuse almost complete. I have stopped short of the top decking because I want to put in a tail wheel bracket that I don't have yet. I also want to put some servo mounts in the tail. I like the way that is shown in the original photos. There is just enough room in the tail to get 2 servos - if you keep them square with the plane center line. This means that the rear edge of the servo mount must be built up. | 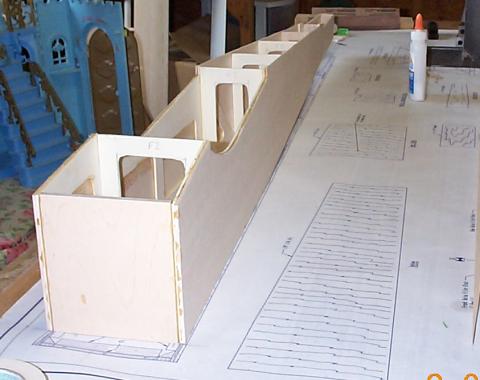
|
|
29-Nov-07 Here is the fuselage going together. I know that the engine is going to be heavy by at least 1 pound. To compensate for the extra weight I have moved the firewall back 1-1/4 inches. I hope this will make the plane closer to being balanced. I don't want to add weight to balance a plane that is already over weight. | 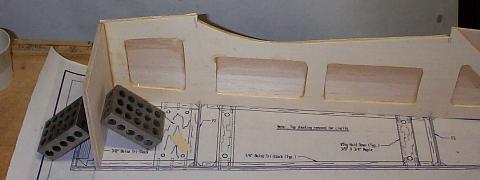
|
|
29-Sept-07 Here is a pic. of the fuse side showing the extensions. I cut the sides at the doubler and glued it all together. The doubler will give it plenty of strength. | 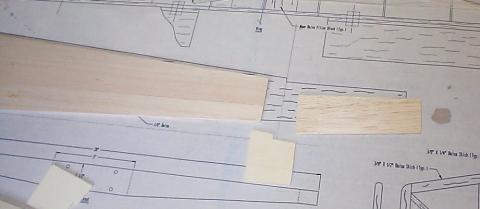
|
|
29-Sept-07 The fuselage is next. I cut out all of the parts for the fuselage then began assembly. | 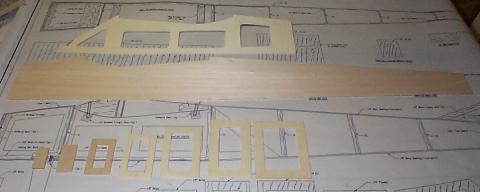
|
|
01-Sept-07 The wing is complete. Everything went well except installing the hold-down filler blocks. If you look at the magazine article, they explain this in comments with a picture. I was not looking at the magazine article, I was using the copy that came with the plans. It is the same text, but no pictures. Oh well, not a problem. | 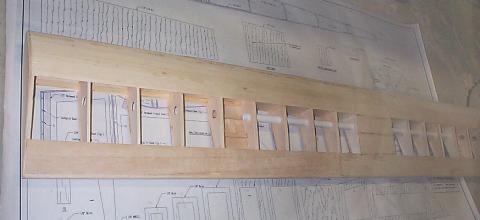
|
| 25-Aug-2007 Here is the wing with all 22 of those ribs installed and starting on the wing sheathing. I could not resist the urge to change something, and made the wing 2 inches longer than the plans show. I simply added 1/8 of an inch to the spacing of 8 ribs on each side. | 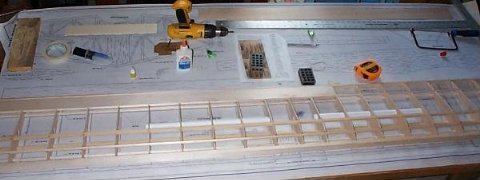
|
| 24-Aug-2007 The construction of the plane has finally began. Shown here is my home built mini cnc router/engraver cutting out the ribs for the wing. They were all cut by the cnc machine and came out very good. The fit of the ribs was so good that I could assemble the whole wing without glue and pick it up off of the table without it falling apart. | 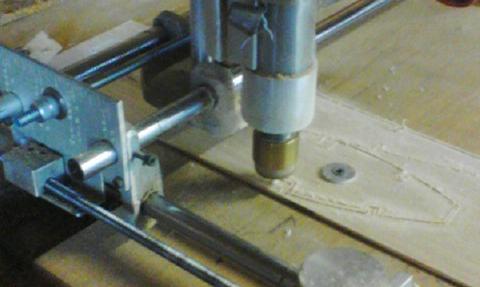
|
| 10580 hits since February 23, 2016 |